- Learn how to build a decision tree model using Weka
- This tutorial is perfect for newcomers to machine learning and decision trees, and those folks who are not comfortable with coding
Introduction
“The greater the obstacle, the more glory in overcoming it.”
– Moliere
Machine learning can be intimidating for folks coming from a non-technical background. All machine learning jobs seem to require a healthy understanding of Python (or R).
So how do non-programmers gain coding experience? It’s not a cakewalk!

Here’s the good news – there are plenty of tools out there that let us perform machine learning tasks without having to code. You can easily build algorithms like decision trees from scratch in a beautiful graphical interface. Isn’t that the dream? These tools, such as Weka, help us primarily deal with two things:
- Quickly build a machine learning model, like a decision tree, and understand how the algorithm is performing. This can later be modified and built upon
- This is ideal for showing the client/your leadership team what you’re working with
This article will show you how to solve classification and regression problems using Decision Trees in Weka without any prior programming knowledge!
But if you are passionate about getting your hands dirty with programming and machine learning, I suggest going through the following wonderfully curated courses:
Table of Contents
- Classification vs. Regression in Machine Learning
- Understanding Decision Trees
- Exploring the Dataset in Weka
- Classification using Decision Tree in Weka
- Decision Tree Parameters in Weka
- Visualizing a Decision Tree in Weka
- Regression using Decision Tree in Weka
Classification vs. Regression in Machine Learning
Let me first quickly summarize what classification and regression are in the context of machine learning. It’s important to know these concepts before you dive into decision trees.
A classification problem is about teaching your machine learning model how to categorize a data value into one of many classes. It does this by learning the characteristics of each type of class. For example, to predict whether an image is of a cat or dog, the model learns the characteristics of the dog and cat on training data.
A regression problem is about teaching your machine learning model how to predict the future value of a continuous quantity. It does this by learning the pattern of the quantity in the past affected by different variables. For example, a model trying to predict the future share price of a company is a regression problem.
You can find both these problems in abundance on our DataHack platform.
Now, let’s learn about an algorithm that solves both problems – decision trees!
Understanding Decision Trees
Decision trees are also known as Classification And Regression Trees (CART). They work by learning answers to a hierarchy of if/else questions leading to a decision. These questions form a tree-like structure, and hence the name.
For example, let’s say we want to predict whether a person will order food or not. We can visualize the following decision tree for this:
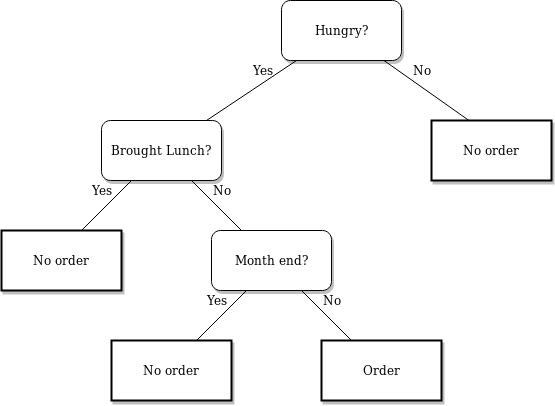
Each node in the tree represents a question derived from the features present in your dataset. Your dataset is split based on these questions until the maximum depth of the tree is reached. The last node does not ask a question but represents which class the value belongs to.
- The topmost node in the Decision tree is called the Root node
- The bottom-most node is called the Leaf node
- A node divided into sub-nodes is called a Parent node. The sub-nodes are called Child nodes
If you want to understand decision trees in detail, I suggest going through the below resources:
- Getting Started with Decision Trees (Free Course)
- Tree-Based Algorithms: A Complete Tutorial from Scratch
What is Weka? Why Should You Use Weka for Machine Learning?
” Weka is a free open-source software with a range of built-in machine learning algorithms that you can access through a graphical user interface! “
WEKA stands for Waikato Environment for Knowledge Analysis and was developed at the University of Waikato, New Zealand.
Weka has multiple built-in functions for implementing a wide range of machine learning algorithms from linear regression to neural network. This allows you to deploy the most complex of algorithms on your dataset at just a click of a button! Not only this, Weka gives support for accessing some of the most common machine learning library algorithms of Python and R!
With Weka you can preprocess the data, classify the data, cluster the data and even visualize the data! This you can do on different formats of data files like ARFF, CSV, C4.5, and JSON. Weka even allows you to add filters to your dataset through which you can normalize your data, standardize it, interchange features between nominal and numeric values, and what not!
I could go on about the wonder that is Weka, but for the scope of this article let’s try and explore Weka practically by creating a Decision tree. Now go ahead and download Weka from their official website!
Exploring the Dataset in Weka
I will take the Breast Cancer dataset from the UCI Machine Learning Repository. I recommend you read about the problem before moving forward.
Let us first load the dataset in Weka. To do that, follow the below steps:
- Open Weka GUI
- Select the “Explorer” option.
- Select “Open file” and choose your dataset.
Your Weka window should now look like this:
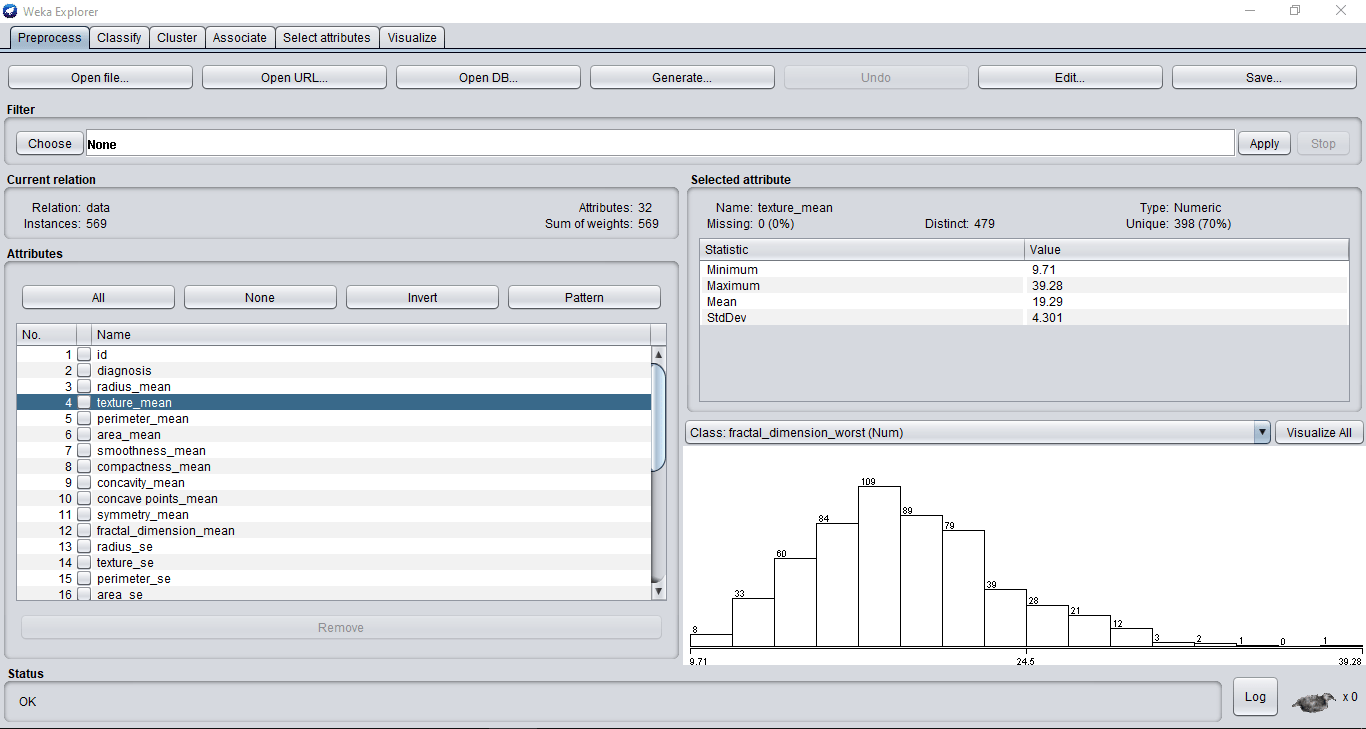
You can view all the features in your dataset on the left-hand side. Weka automatically creates plots for your features which you will notice as you navigate through your features.
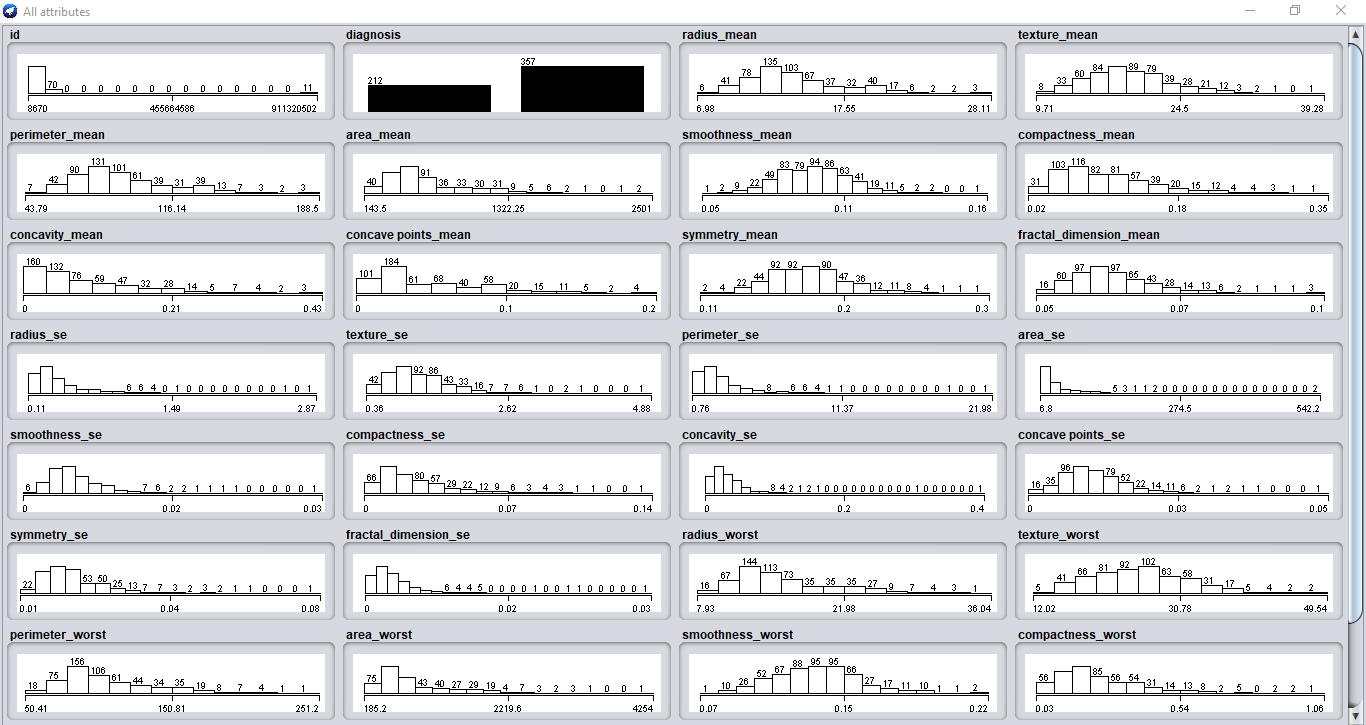
You can even view all the plots together if you click on the “Visualize All” button.
Now let’s train our classification model!
Classification using Decision Tree in Weka
Implementing a decision tree in Weka is pretty straightforward. Just complete the following steps:
- Click on the “Classify” tab on the top
- Click the “Choose” button
- From the drop-down list, select “trees” which will open all the tree algorithms
- Finally, select the “RepTree” decision tree
” Reduced Error Pruning Tree (RepTree) is a fast decision tree learner that builds a decision/regression tree using information gain as the splitting criterion, and prunes it using reduced error pruning algorithm.”You can read about the reduced error pruning technique in this research paper.

“Decision tree splits the nodes on all available variables and then selects the split which results in the most homogeneous sub-nodes.”
Information Gain is used to calculate the homogeneity of the sample at a split.
You can select your target feature from the drop-down just above the “Start” button. If you don’t do that, WEKA automatically selects the last feature as the target for you.
The “Percentage split” specifies how much of your data you want to keep for training the classifier. The rest of the data is used during the testing phase to calculate the accuracy of the model.
With “Cross-validation Fold” you can create multiple samples (or folds) from the training dataset. If you decide to create N folds, then the model is iteratively run N times. And each time one of the folds is held back for validation while the remaining N-1 folds are used for training the model. The result of all the folds is averaged to give the result of cross-validation.
The greater the number of cross-validation folds you use, the better your model will become. This makes the model train on randomly selected data which makes it more robust.
Finally, press the “Start” button for the classifier to do its magic!
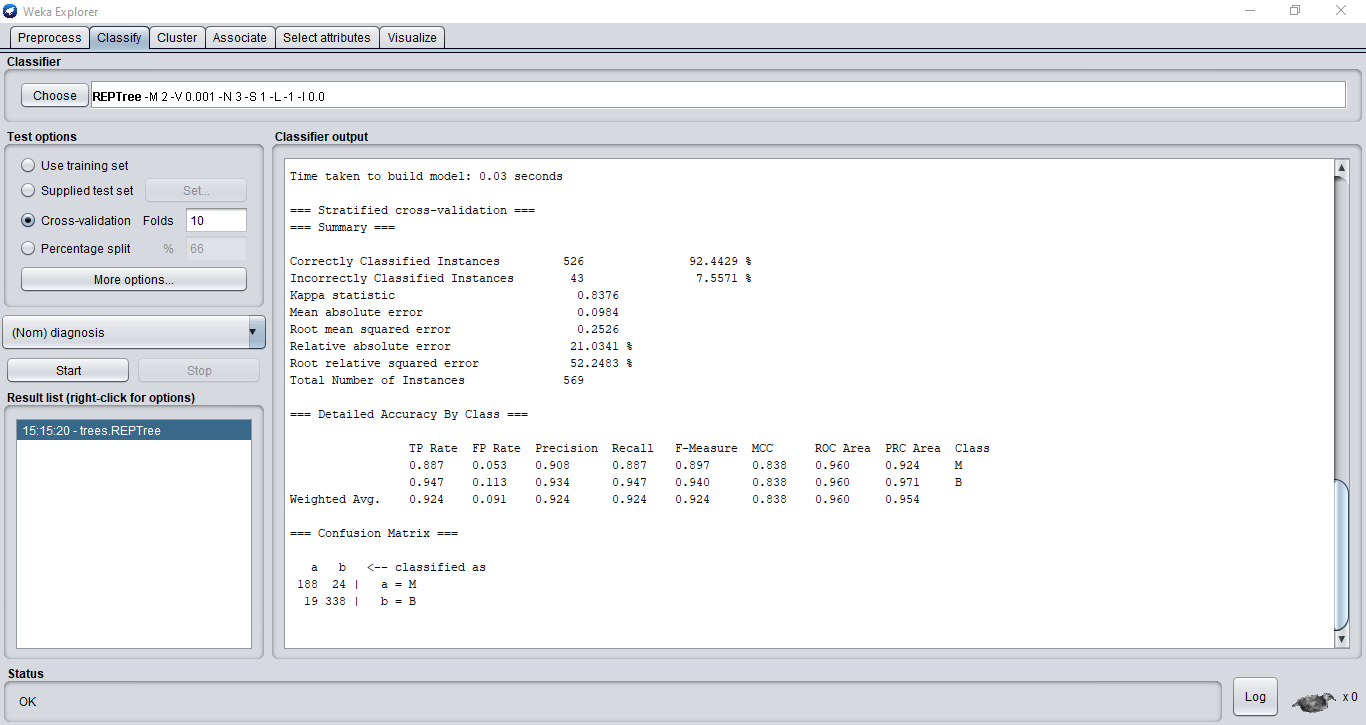
Our classifier has got an accuracy of 92.4%. Weka even prints the Confusion matrix for you which gives different metrics. You can study about Confusion matrix and other metrics in detail here.
Decision Tree Parameters in Weka
Decision trees have a lot of parameters. We can tune these to improve our model’s overall performance. This is where a working knowledge of decision trees really plays a crucial role.
You can access these parameters by clicking on your decision tree algorithm on top:
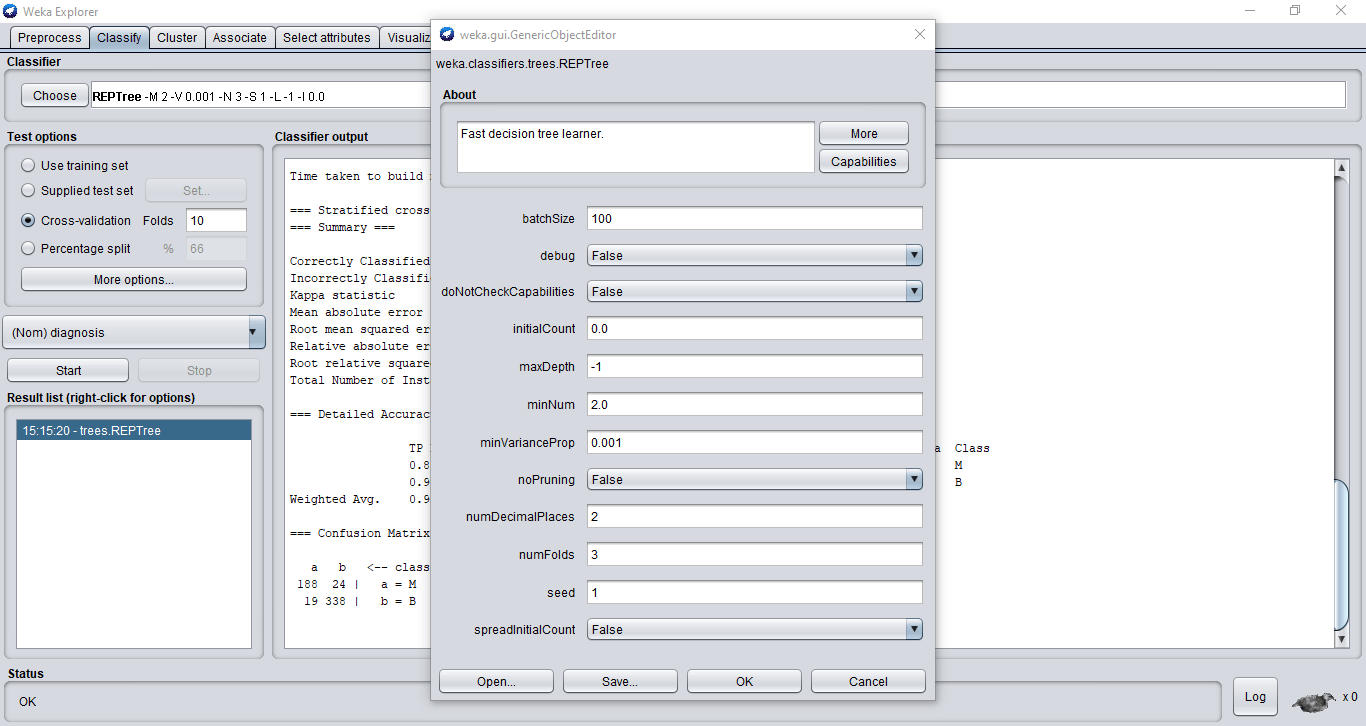
Let’s briefly talk about the main parameters:
- maxDepth – It determines the maximum depth of your decision tree. By default, it is -1 which means the algorithm will automatically control the depth. But you can manually tweak this value to get the best results on your data
- noPruning– Pruning means to automatically cut back on a leaf node that does not contain much information. This keeps the decision tree simple and easy to interpret
- numFolds– The specified number of folds of data will be used for pruning the decision tree. The rest will be used for growing the rules
- minNum – Minimum number of instances per leaf. If not mentioned, the tree will keep splitting till all leaf nodes have only one class associated with it
You can always experiment with different values for these parameters to get the best accuracy on your dataset.
Visualizing your Decision Tree in Weka
Weka even allows you to easily visualize the decision tree built on your dataset:
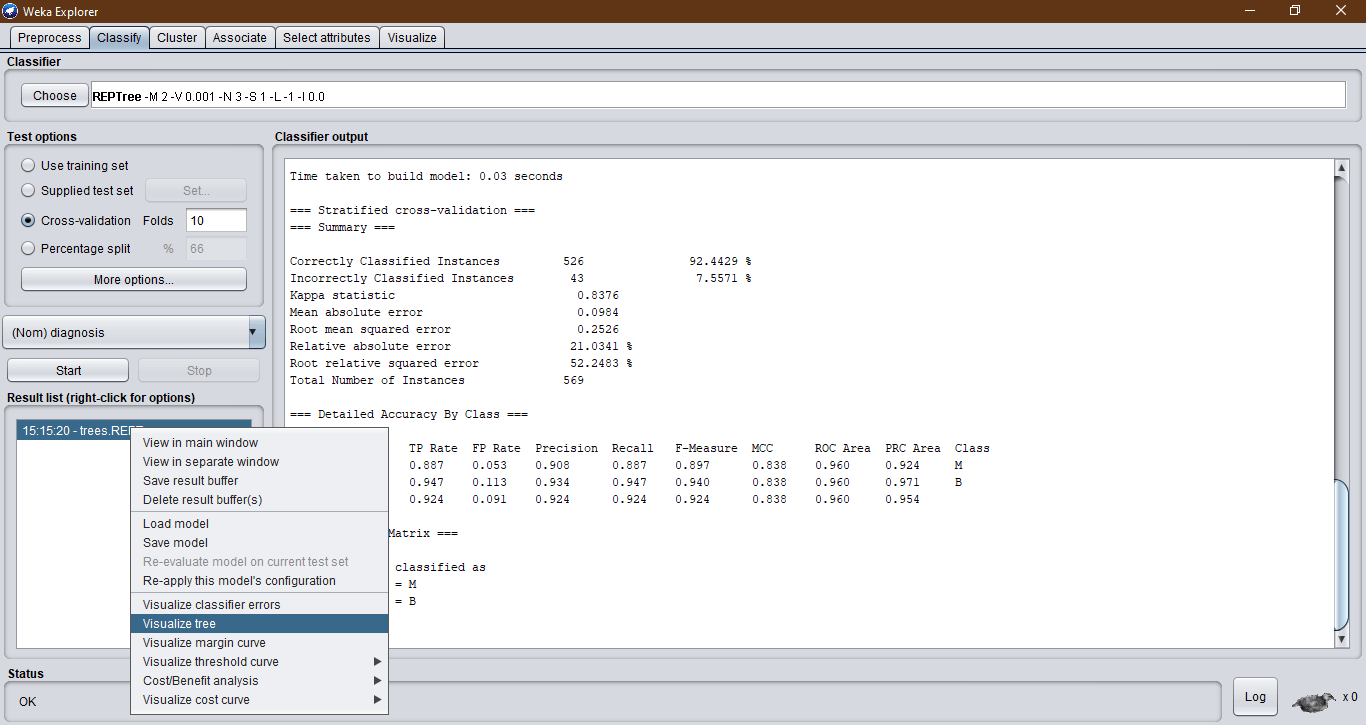
- Go to the “Result list” section and right-click on your trained algorithm
- Choose the “Visualise tree” option
Your decision tree will look like below:
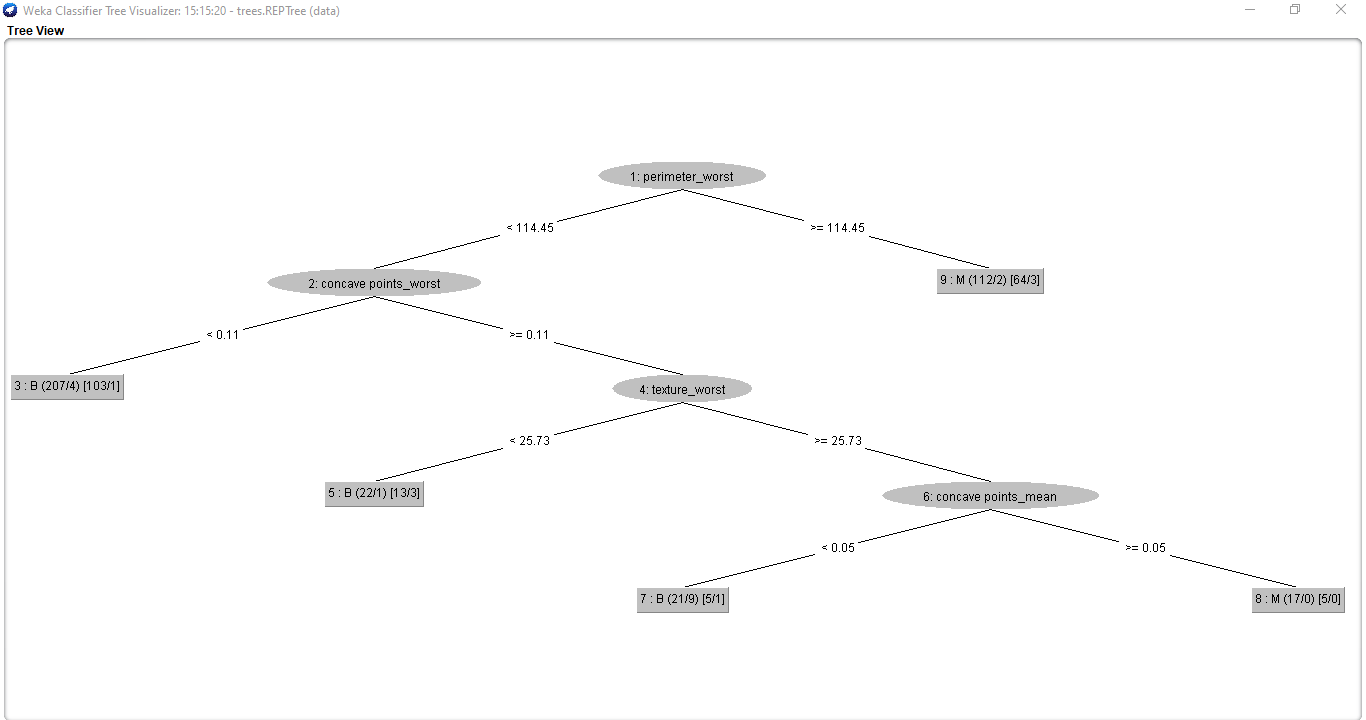
Interpreting these values can be a bit intimidating but it’s actually pretty easy once you get the hang of it.
- The values on the lines joining nodes represent the splitting criteria based on the values in the parent node feature
- In the leaf node:
- The value before the parenthesis denotes the classification value
- The first value in the first parenthesis is the total number of instances from the training set in that leaf. The second value is the number of instances incorrectly classified in that leaf
- The first value in the second parenthesis is the total number of instances from the pruning set in that leaf. The second value is the number of instances incorrectly classified in that leaf
Regression using Decision Tree in Weka
Like I said before, Decision trees are so versatile that they can work on classification as well as on regression problems. For this, I will use the “Predict the number of upvotes” problem from Analytics Vidhya’s DataHack platform.
Here, we need to predict the rating of a question asked by a user on a question and answer platform.
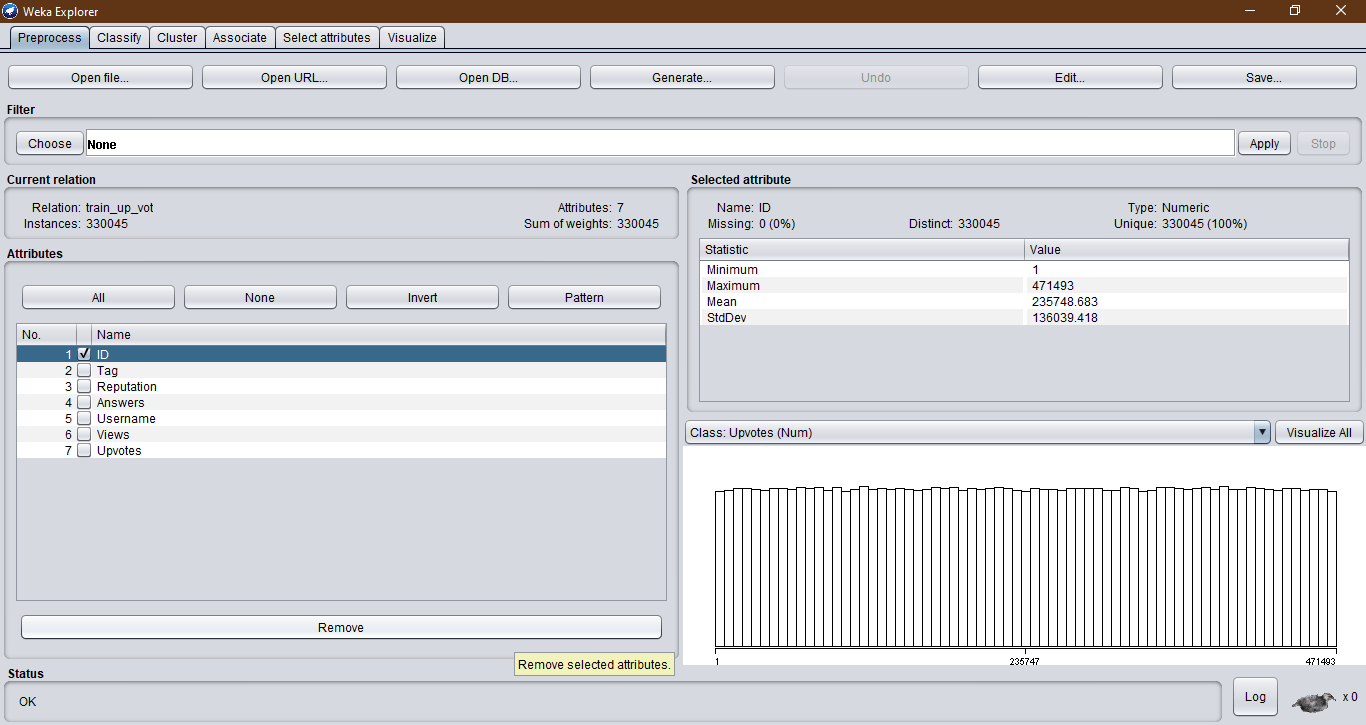
As usual, we’ll start by loading the data file. But this time, the data also contains an “ID” column for each user in the dataset. This would not be useful in the prediction. So, we will remove this column by selecting the “Remove” option underneath the column names:
We can make predictions on the dataset as we did for the Breast Cancer problem. RepTree will automatically detect the regression problem:
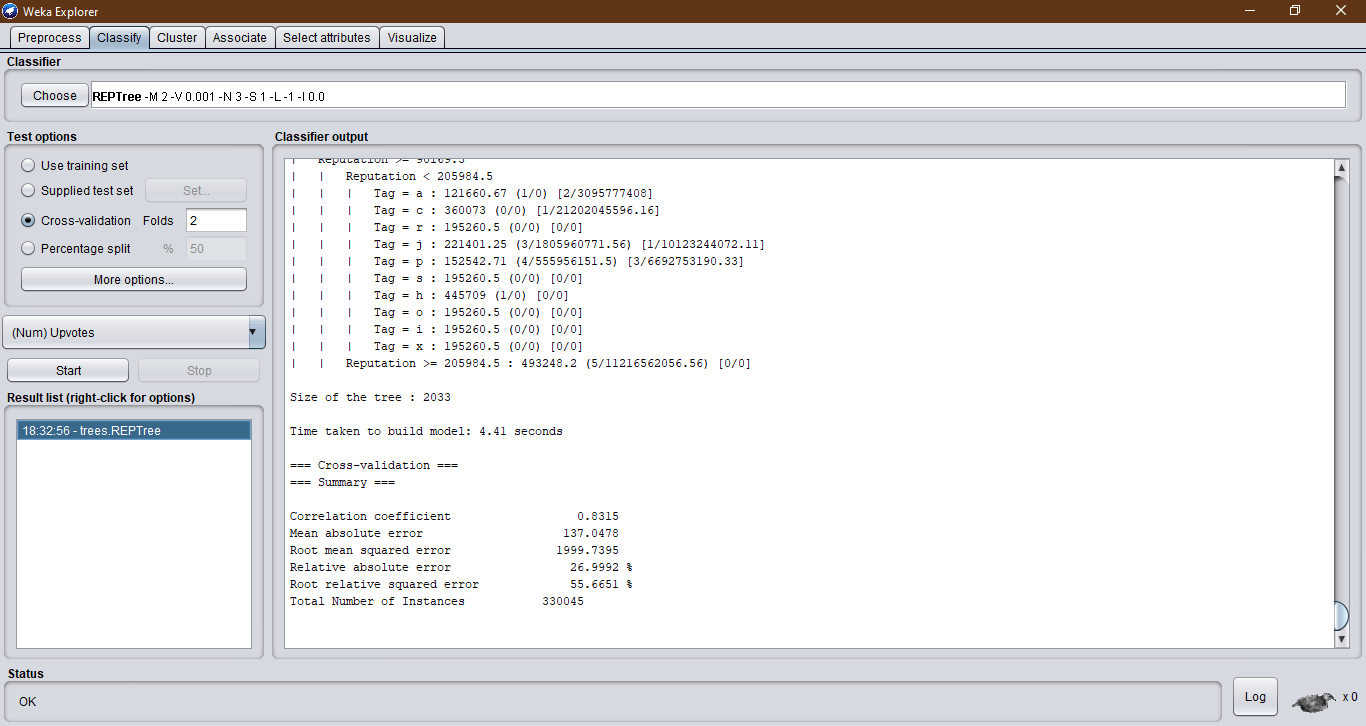
The evaluation metric provided in the hackathon is the RMSE score. We can see that the model has a very poor RMSE without any feature engineering. This is where you step in – go ahead, experiment and boost the final model!
End Notes
And just like that, you have created a Decision tree model without having to do any programming! This will go a long way in your quest to master the working of machine learning models.
If you want to learn and explore the programming part of machine learning, I highly suggest going through these wonderfully curated courses on the Analytics Vidhya website: